🔧 Measure Up to Excellence!
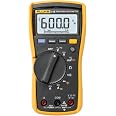
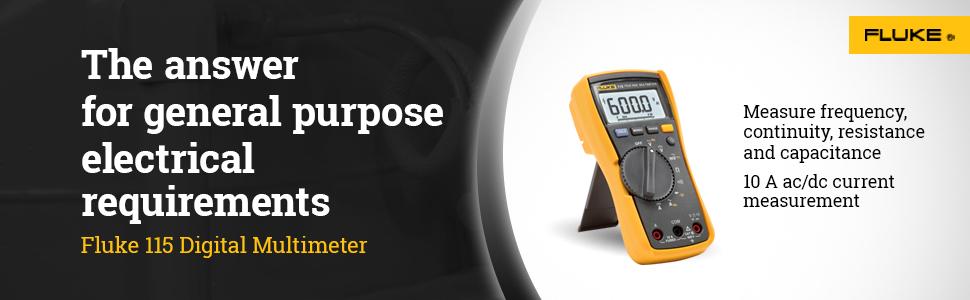
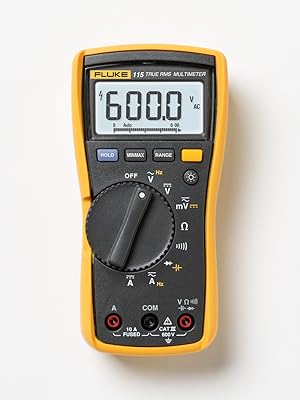
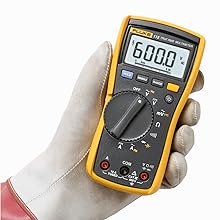
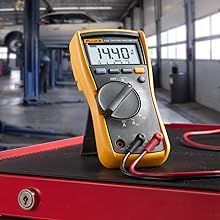
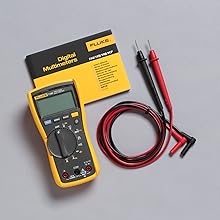
The Fluke 115 Digital Multimeter is a compact, professional-grade tool designed for field technicians. It measures AC/DC voltage up to 600V, current up to 10A, and offers features like resistance, continuity, frequency, and capacitance measurements. With a safety rating of CAT III 600V, a large LED backlight, and included accessories, it’s the ultimate companion for accurate and safe electrical testing.


J**N
Great!
This multimeter is amazing! Very accurate battery life is like forever! Display is nice and crisp, easy to use, it’s not very heavy either.
A**A
Expensive
Good but still figuring oit
S**T
Compact, light
Awesome meter
R**Y
Finally got a Fluke
I have a lot of quality test equipment, from Klein mostly. However as far back as I can remember I always wanted a Fluke DVM, and now I have one and love it. Of particular interest to me is the fact that when you set for continuity it will also detect diodes but with those it gives one short beep, while a full short gives you a beep until you move it off that location. Great for tracing out PCBoards.
R**D
Great meter!
I'm a retired avionics engineer but these days I repair vintage audio components for customers or for resale out of my home shop. This Fluke replaced a cheaper meter that quit measuring capacitance. If I was still working on aircraft systems, this Fluke 115 would still be a reliable test instrument for 90% of needed applications, but it definitely meets or exceeds the needs of an audio technician or engineer. I DO wish it had the capability to measure higher AC/DC voltages than the rated limit of 600V, but I have a need for a high voltage probe anyway. I'll build one and get by for the times that I need to measure voltages in excess of that limit, but it's not a big deal at all. Having said all of that, this is an electronic technician's meter, NOT an electrician's meter. This meter will NOT measure the low microvolts produced by a thermocouple in a HVAC work environment and it does NOT have the capability of making non-contact AC verification as is standard in other Fluke meters that are designed to be more suitable in commercial electrical work. If you're unsure of the correct meter for your application, go to the Fluke website for clarification. Other than that, this is a Fluke tool - built to last and perform perfectly day after day for the work environment that it was designed for. Can't go wrong with a Fluke meter.
G**E
Great Meter! LCD Contrast Fix
I bought my Fluke 115 new from Amazon in Mar 2016. Fantastic meter with low-contrast display, or so I thought.Read on IF you are having issues with the display on this series of Fluke DMM models (114, 115, 117).PROS:- Accurate, quality case and stand, simple to operate- Nice min/max & range features- Perfect size and precision for 95% of what I do in my engineering lab with a DMM- Durable, although mine has been in my indoor lab all it's life (4 years)- Trusted Fluke reliability and dependability, except for...- Good value for money spent IMHOCons:- The Display has been low contrast, getting worse over time, and has a narrow usable field of view, ...until you fix it.- Fluke must have gone through a real QA control challenge for some time, and my meter fell out of that period :(- Fluke: You owe us for 60 mins of research and 45 mins of labor to fix your display!!! PLEASE Do better with your QA.How to Fix (or at least greatly help) a low-contrast LCD display:- disassemble the Meter screw by screw- one for battery case/stand- two for back cover- four for PCB with metal shield attached with 2 of 4- three for metal bracket to probe input attachment- gently pop out the PCB assembly- VERY gently pop loose the dark gray plastic LCD display frame and...- Gently peel back the top Zebra connector from PCB (feels like self-adhesive, but not too strong)- Gently remove the white LCD backlit bezel from PCB.- Gently clean Zebra connector gold-pads on PCB with rubber eraser. Be thorough, but gentle.- ***** Turns out THIS is what is causing the problem.- Gently clean the Zebra connector strip on back of display AND the copper pads on PCB with alcohol and lintless pad-tip (use Q-tip in a pinch, but clean off any "hairs").- While you have the patient open, clean other gold-pads on PCB for switches in the same manner (rubber eraser, alcohol).- Thoroughly clean the glass surfaces of display and backlight bezel. Don't allow static to put dust or specs back on.- You should use ESD protection, so static may not be an issue. Make sure these display surfaces are clean prior to reassembly.- INTERESTING NOTE ON MINE: There was a 'dot' of styrofoam on the inside of my display and 3 tiny pieces of lint that bothered me for 4 years. Small specs of dust also. Could not tell what was causing the tiny shadows in the display, but now I know. CONCLUSION: This Fluke Meter was NOT assembled in a clean environment at the factory. You can do better than this, Fluke! We all know you can!- Gently reassemble in reverse order. Do NOT over-tighten screws as they are going into plastic- Turn Meter back on, see if your display contrast and viewing angles have improved. My changes were significant!- No more tiny blots of shadow due to debris left inside during initial assembly- Contrast improved by at least 3:1 (a qualitative estimate)- viewing angle much better from all sides, especially when looking from below the display- Backlight improved with better contrast, less glare, much better light balance (although they should have used two LEDS instead of one).- I feel like I have a brand new meter that is MUCH easier to read in all of my lab and household use scenarios.Fluke: This could have been a 5-star review if you had been on top of cleanliness during assembly.
Trustpilot
3 weeks ago
1 day ago